What is Terraform?
There are several ways to prepare the environment for running the system on the cloud, as shown in the link below, but Terraform is an IaC tool for building the environment on the cloud with code.
Terraform is an OSS tool developed by HashiCorp, which is being actively developed with a fast version upgrade, and has become the de facto standard for IaC tools due to the large number of cloud vendors that support it.
It can be run on multiple operating systems such as Windows, macOS, Linux, etc., and it is a tool used from the command line.
The code defines resources to be created using a unique language based on JSON called HCL (HashiCorp Configuration Language).
If you learn how to use Terraform, you can support multiple cloud vendors, so it will be easier to build a multi-cloud environment using multiple cloud services.
On this page, we use Terraform to do “Hello World!”, Which is often found in programming language introductory books, so that those who are new to Terraform can understand it.
See the link below for the basic syntax of Terraform.
Prepare
Install
To install Terraform, follow these steps:
- Download from the official website.
- Unzip the downloaded Zip file to the appropriate folder.
- Set the path environment variable to the path to the unzipped directory.
For information on how to set environment variables, see the link below.

Execution environment
To build an environment on the cloud with Terraform, you need to prepare a tf file that describes information about resources such as virtual networks and virtual computers that you build on the cloud.
Terraform reads tf files and builds an environment on the cloud, but all tf files in the directory (current directory) where Terraform was executed are read and processed.
If there is an extra tf file in the directory, it will be processed together, so you need to create a working directory to put the tf file that you want to process together.
This time, on Terraform, “Hello World!” Because it is a project to display , please create a working directory named “HelloWorld” and create a “main.tf” file in it.
Open the created “main.tf” file with VSCode or a text editor, write the following code, and save it.
variable "input_hello" {
  default = "Hello World!"
}

output "output_hello" {
  value = var.input_hello
}Run
Terraform must run on the working directory where the tf file is placed.
You must run cd [working directory]on the command line, change to the working directory, and then run subsequent Terraform commands.
Initialize
To run Terraform, you must first initialize the working directory.
To initialize the working directory, run the following command in the working directory:
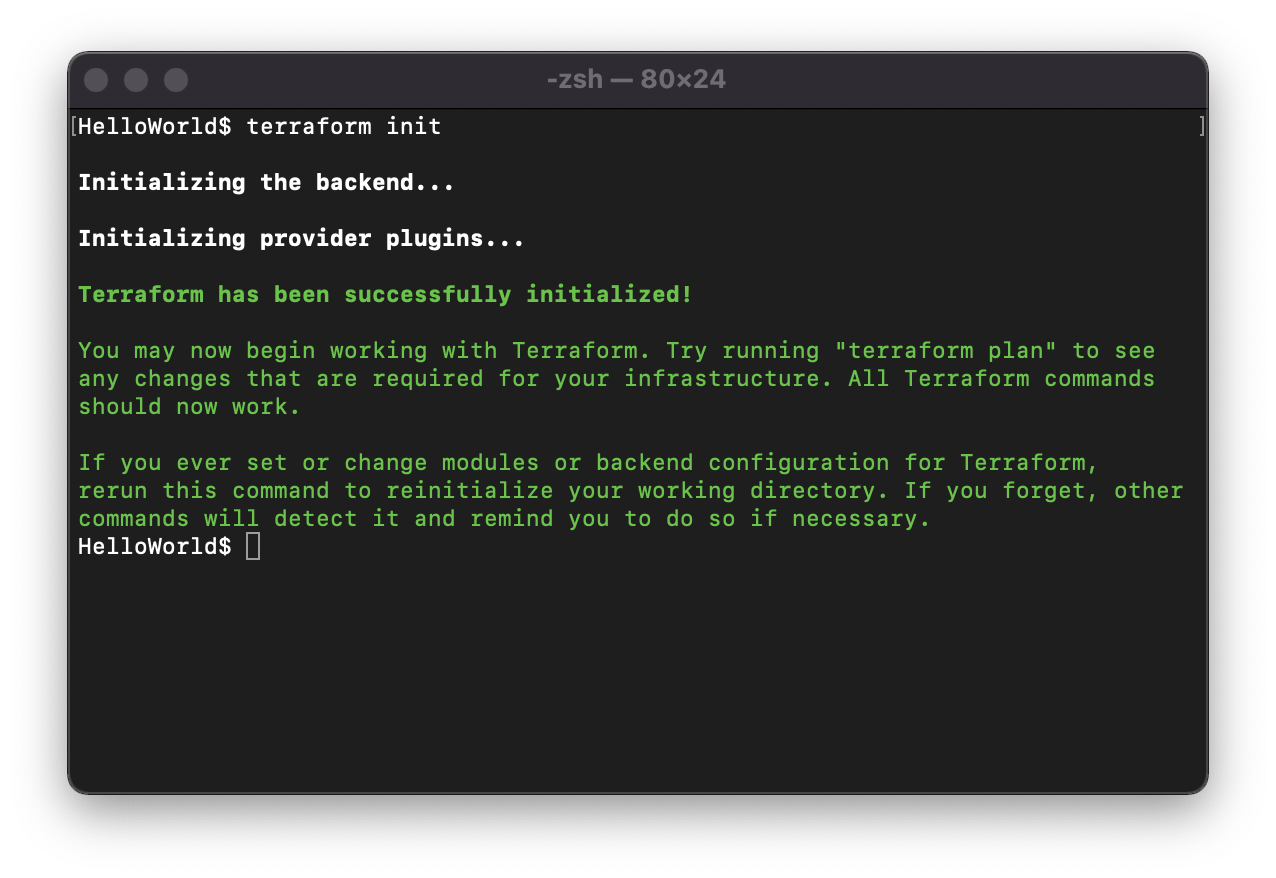
terraform initWhen terraform init is executed, the tf file in the working directory is read, and plug-ins necessary for running, such as plug-ins for connecting to cloud services such as AWS and Azure, are downloaded to the working directory.
When terraform init is executed in the “HelloWorld” directory created earlier, the following screen is displayed and the working directory is initialized.
Build
After running terraform init and initializing the working directory, you are ready to build your environment on the cloud.
To actually build an environment such as a virtual network or a virtual computer on the cloud, run the following command.
terraform applyWhen you run the above command, you will see what will be changed and a confirmation message, so enter “yes” to confirm and execute the changes.
After entering “yes”, a connection is made to cloud services such as AWS and Azure, and the process of creating resources such as virtual networks and virtual computers begins.
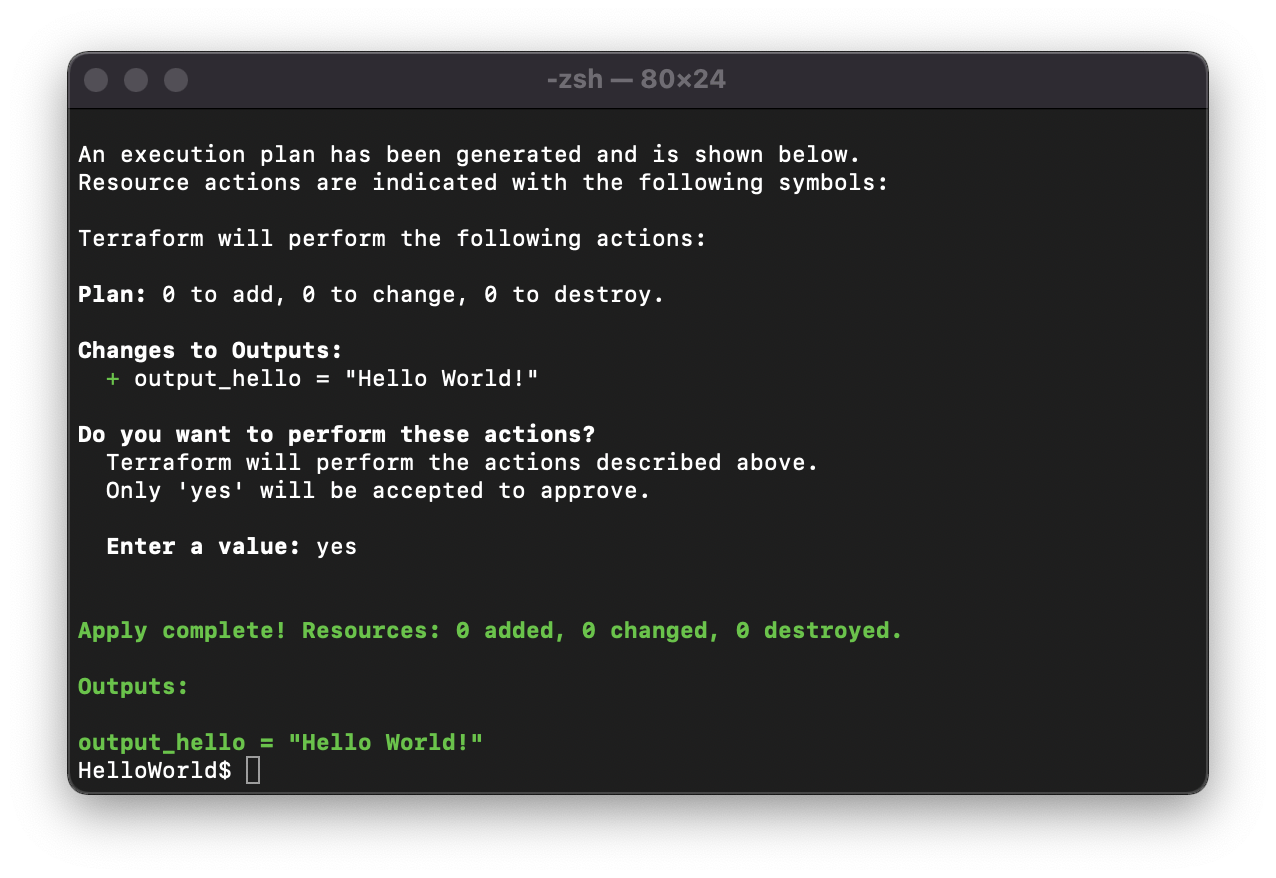
When you run terraform apply in the HelloWorld directory, you will see a screen similar to the one below.
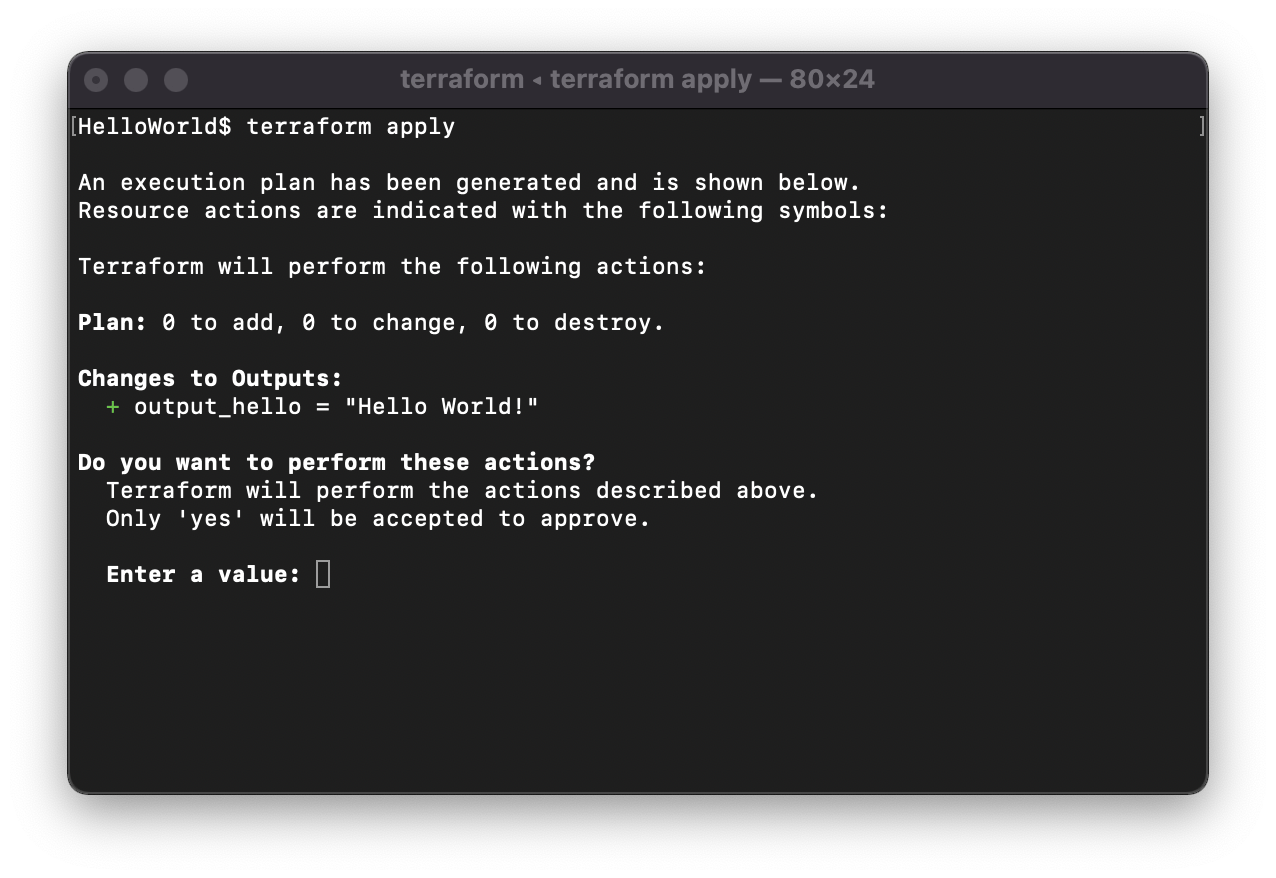
This time, “Hello World!” I created a tf file to output + output_hello = "Hello World!" and is displayed on the screen.
The “+” in front of “output_hello” means that the build process will make changes that add “output_hello”.
Enter “yes” after Enter a value: and press Enter to process. If output_hello = "Hello World!" Is displayed as shown in the screen below, the execution is complete.
Plan
You can also check the changed contents before executing the construction process with terraform apply, but Terraform has a command to only check the changed contents.
You can see how the environment changes by executing the following command.
terraform planWhen you execute the terraform plan in the “Hello World” directory, the following screen will be displayed.
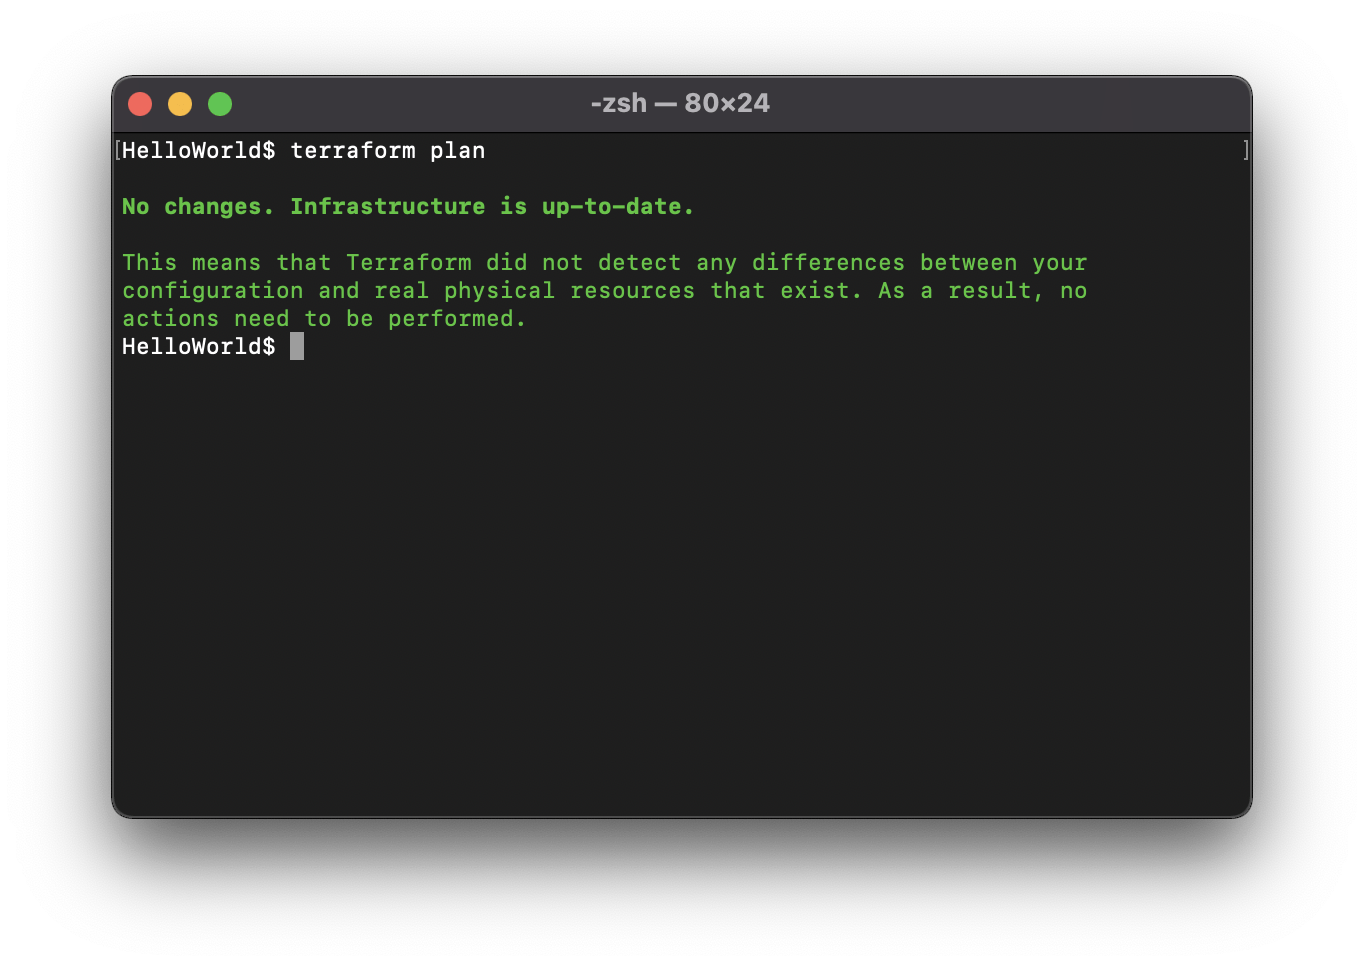
Since the environment has been built with terraform apply, there is no difference between the contents of the tf file and the built environment, so No Changes. Infrastructure is up-to-date. Is displayed.
Open the “main.tf” file in the “Hello World” directory, delete all the code, and save it to see what happens if it changes.
If you execute the terraform plan in this state, the screen below will be displayed.
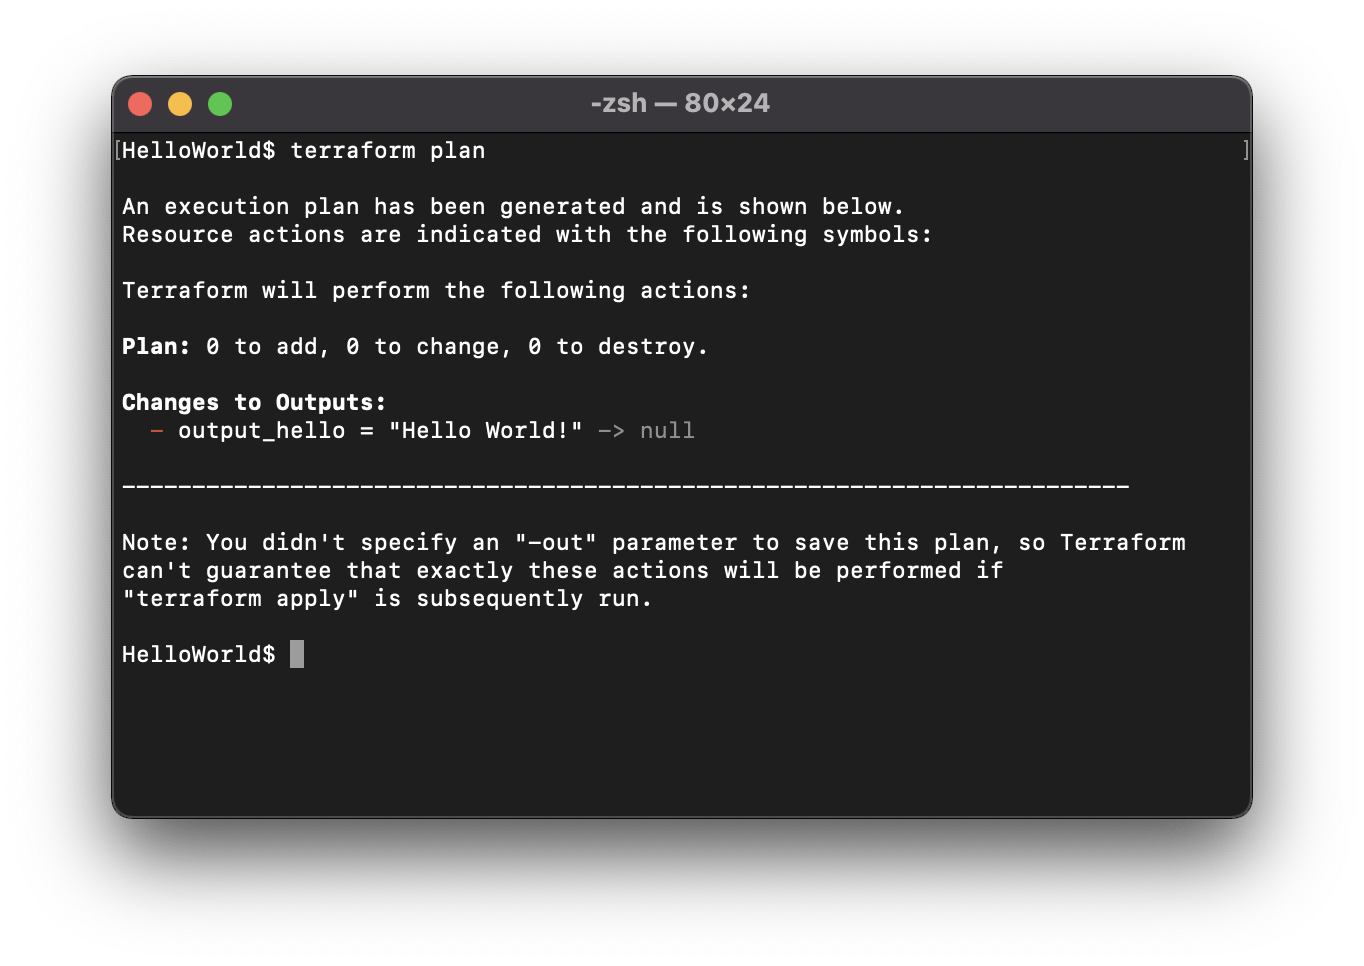
- output_hello = "Hello World!" - > null is displayed.
The “-” in front of the “output_hello” means that “output_hello” will be removed from the build environment when the build process runs.
Now write and save the following code in the main.tf file in the HelloWorld directory.
variable "input_hello" {
  default = "Hello World2!"
}

output "output_hello" {
  value = var.input_hello
}
If you run terraform plan in this state, the screen below will be displayed.
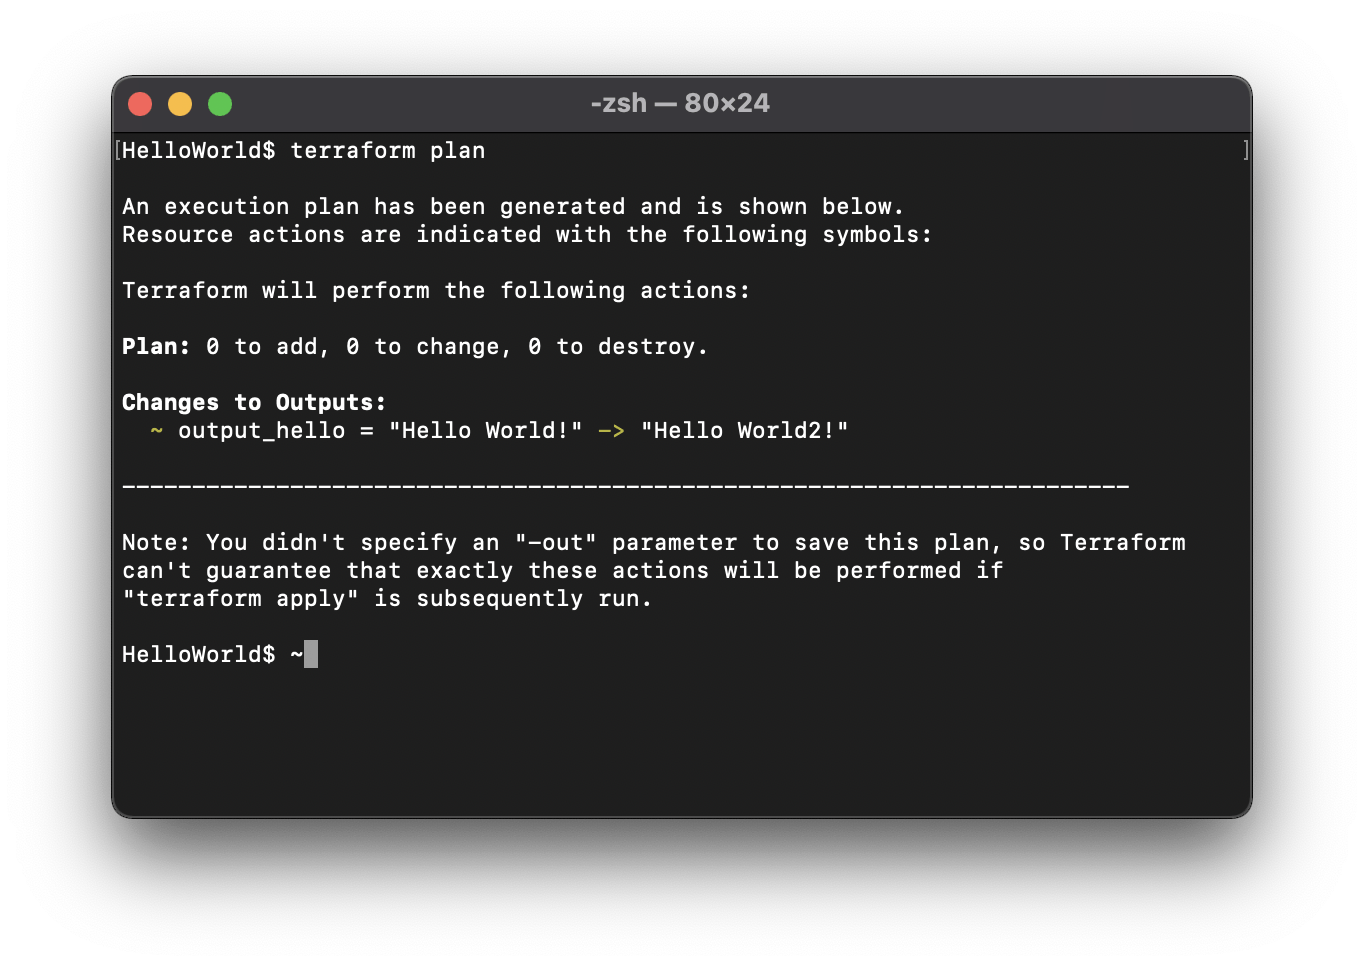
~ output_hello = "Hello World!" -> "Hello World2!" Is displayed.
The “~” before “output_hello” means that “Hello World!” will be replaced with “Hello World2!” when the construction process is executed.
Redo the results of the run
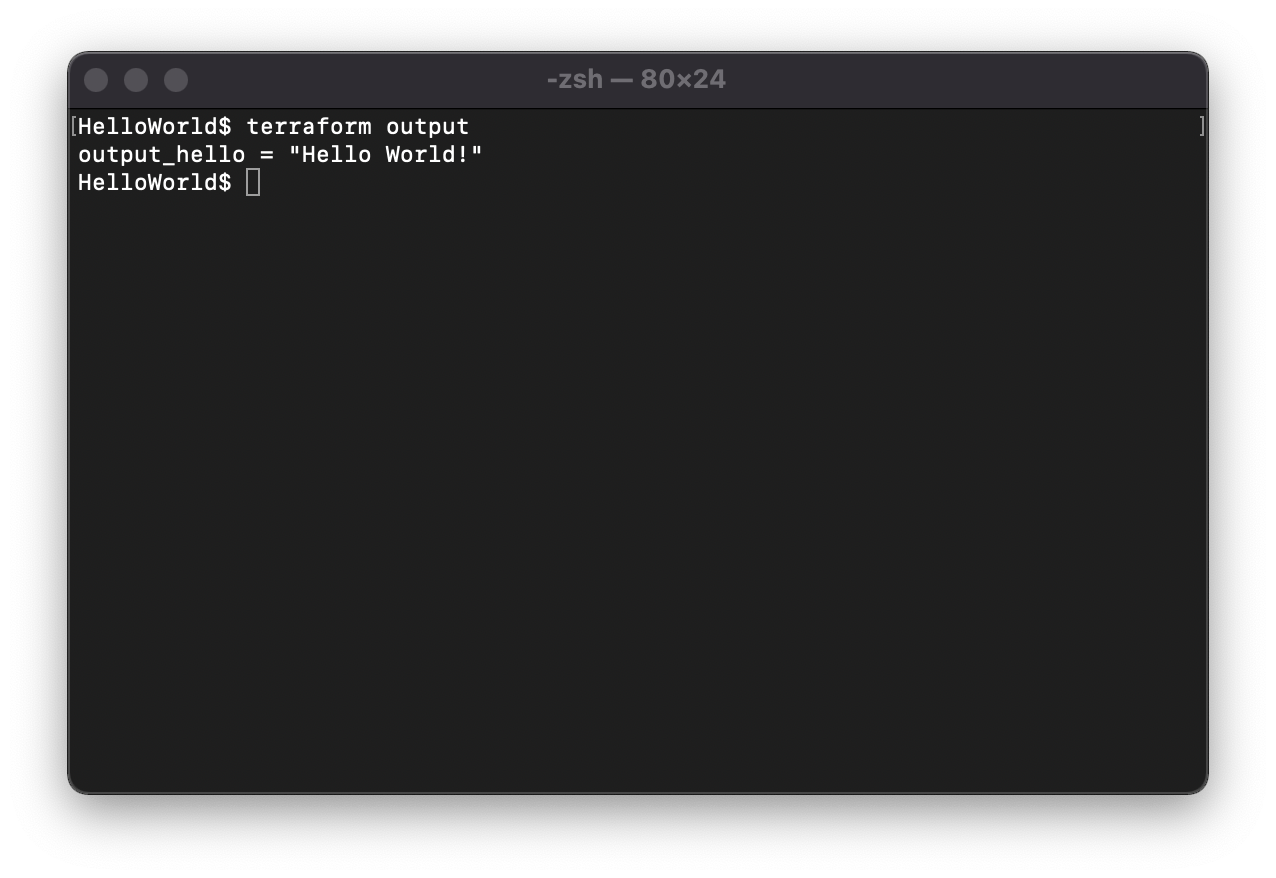
If you execute the following command, you can check the execution result when terraform apply is executed.
terraform outputIf you execute terraform output in the “Hello World” directory, the execution result when terraform apply is executed will be displayed as shown in the screen below.
Discard
The environment built with terraform apply can be easily destroyed by executing the following command.
terraform destroyWhen you execute the above command, the contents to be changed and a confirmation message will be displayed. Confirm the changes and enter “yes” to execute.
After entering “yes”, the process of connecting to cloud services such as AWS and Azure and destroying resources such as virtual networks and virtual computers will start.
When you execute terraform destroy in the “Hello World” directory, the following screen will be displayed.
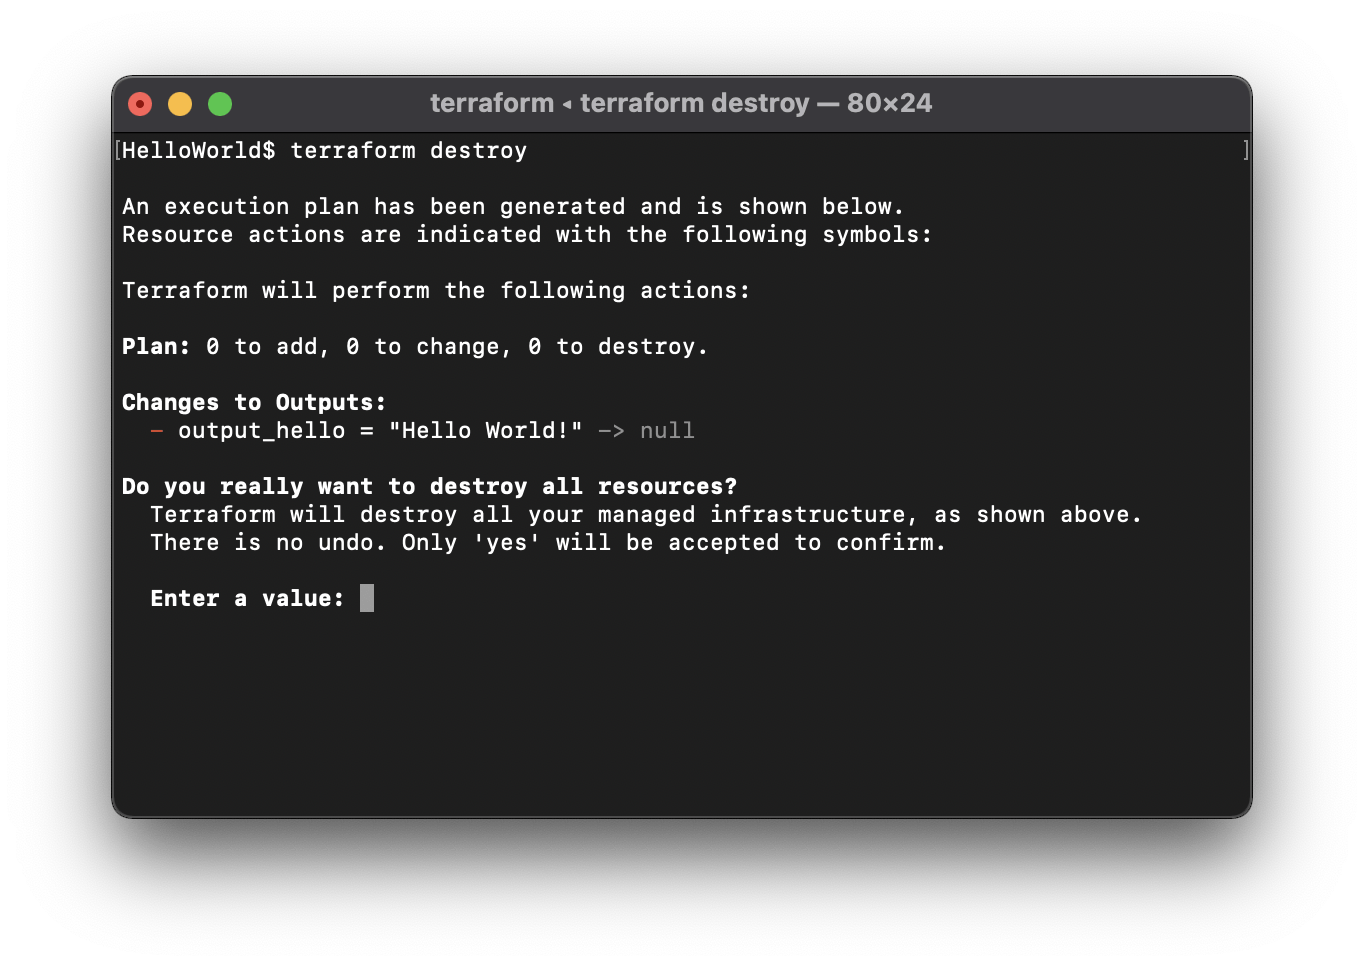
Because it destroys output_hello - "Hello World!" - > null is displayed.
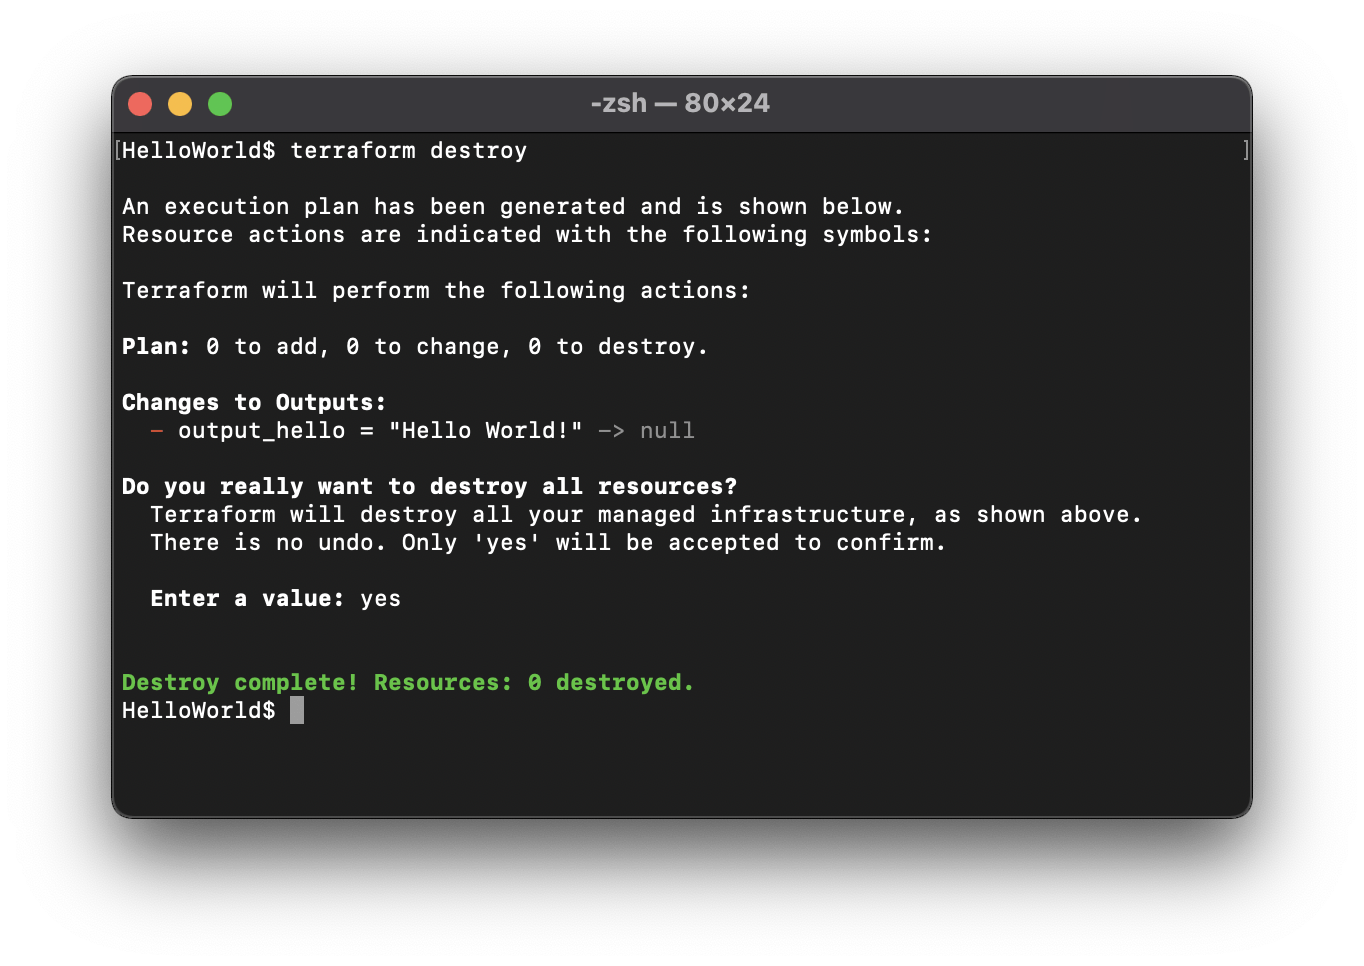
Enter “yes” after Enter a value: and press Enter to process. If Destroy complete! Is displayed as shown in the screen below, the destruction is complete.
Comment