Introduction
The goal is to be able to develop programs compatible with multiple environments such as Windows, Linux, macOS, Android, iOS, iPadOS, etc. on a single PC.
If you check Apple Developer Support, there is a statement that I need a Mac to develop apps for Apple platforms, so a Mac is required to develop an app compatible with Apple OS such as macOS, iOS, iPad OS. I will.

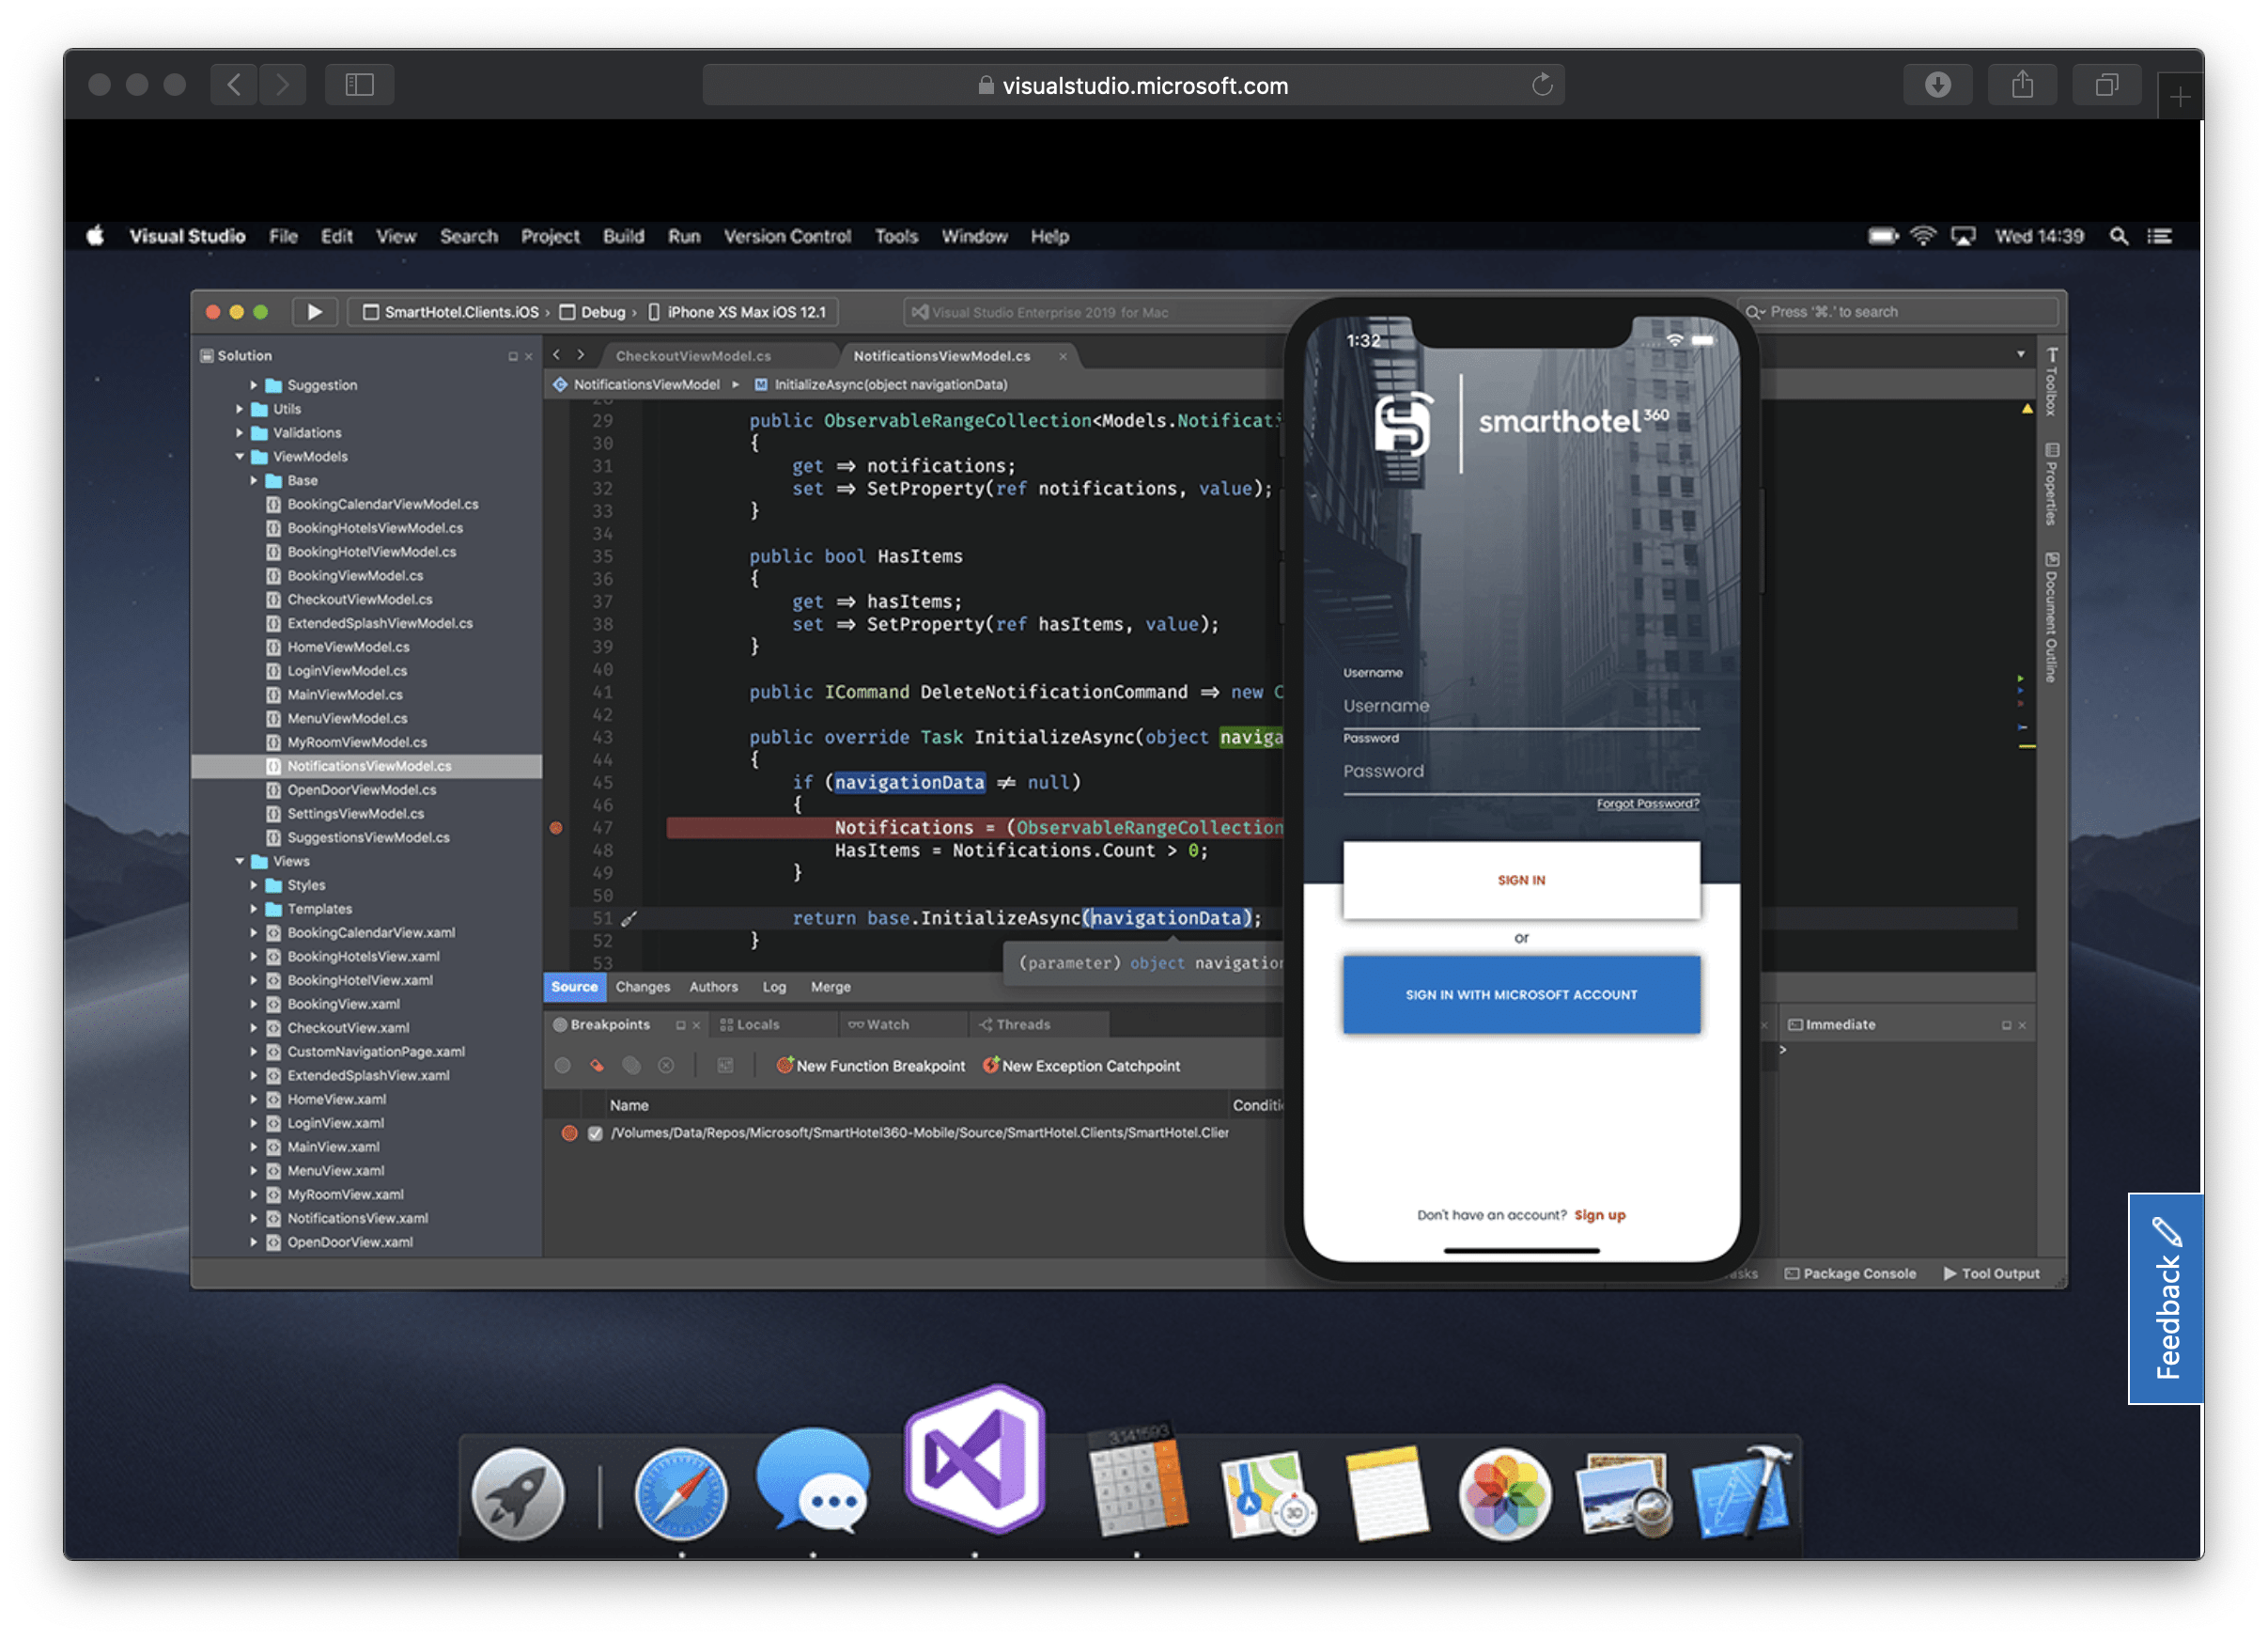
With that, I would like to install Visual Studio 2019 for Mac as a development environment on a Mac so that I can develop with .NET Core + Xamarin.
Applications developed with .Net Core+Xamarin can be confirmed to operate in a virtual environment built on macOS.
For building a virtual environment, refer to the URL below.
Development using the cloud will also be important in future development. Depending on the cloud service, you can set up a virtual computer on the cloud even with the free usage tier.
Please refer to the following links for building a development environment including the cloud.

Environment
Installation environment
This is the Mac spec to install Visual Studio 2019 for Mac.
- Apple MacBook Pro (13-inch, 2020, Four Thunderbolt 3 ports)
- OS: macOS 10.15 Catalina
- CPU: 2.3 GHz Quad Core Intel Core i7
- Memory: 16GB
- SSD: 500GB
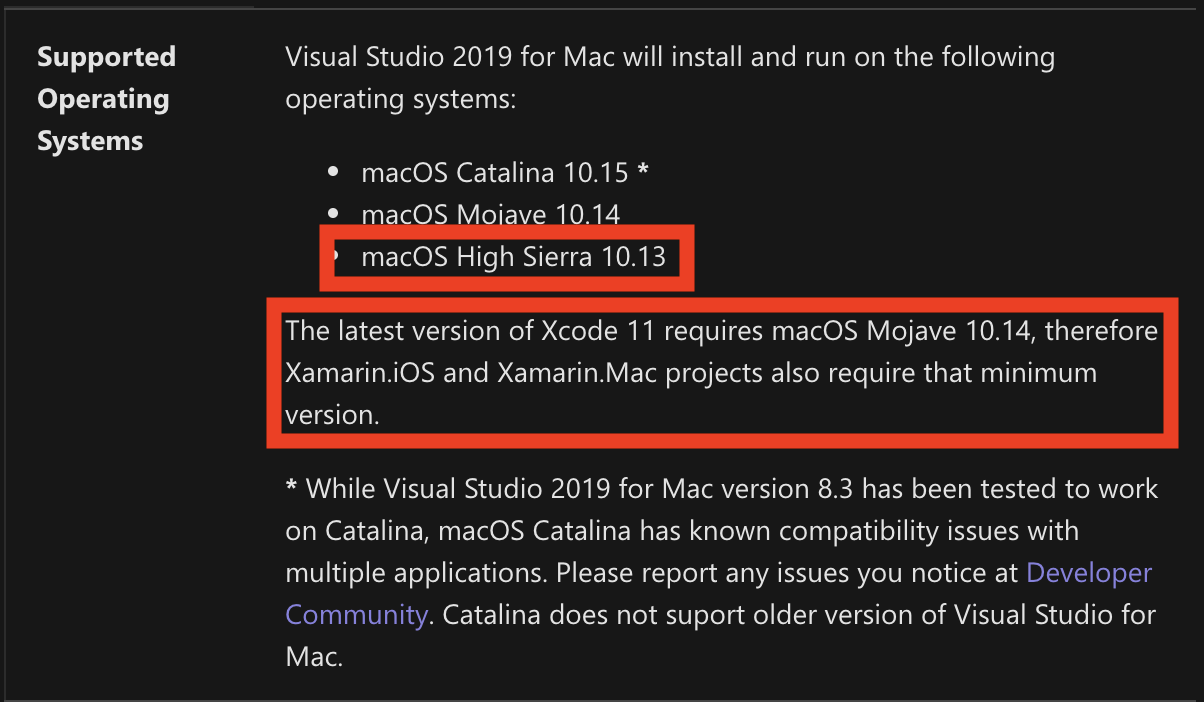
If you check the system requirements of Visual Studio 2019 for Mac, it is compatible with macOS 10.13 High Sierra or later.However, The latest version of Xcode 11 requires macOS Mojave 10.14, therefore Xamarin.iOS and Xamarin.Mac projects also require that minimum version. Has become.
OS development of macOS Mojave 10.14 or later is required to develop apps compatible with macOS, iOS, and iPadOS.
Install
download
Click Download Visual Studio for Mac on this page.

Visual Studio for Mac installation
Double-click the downloaded file to start the installer and display the screen below.
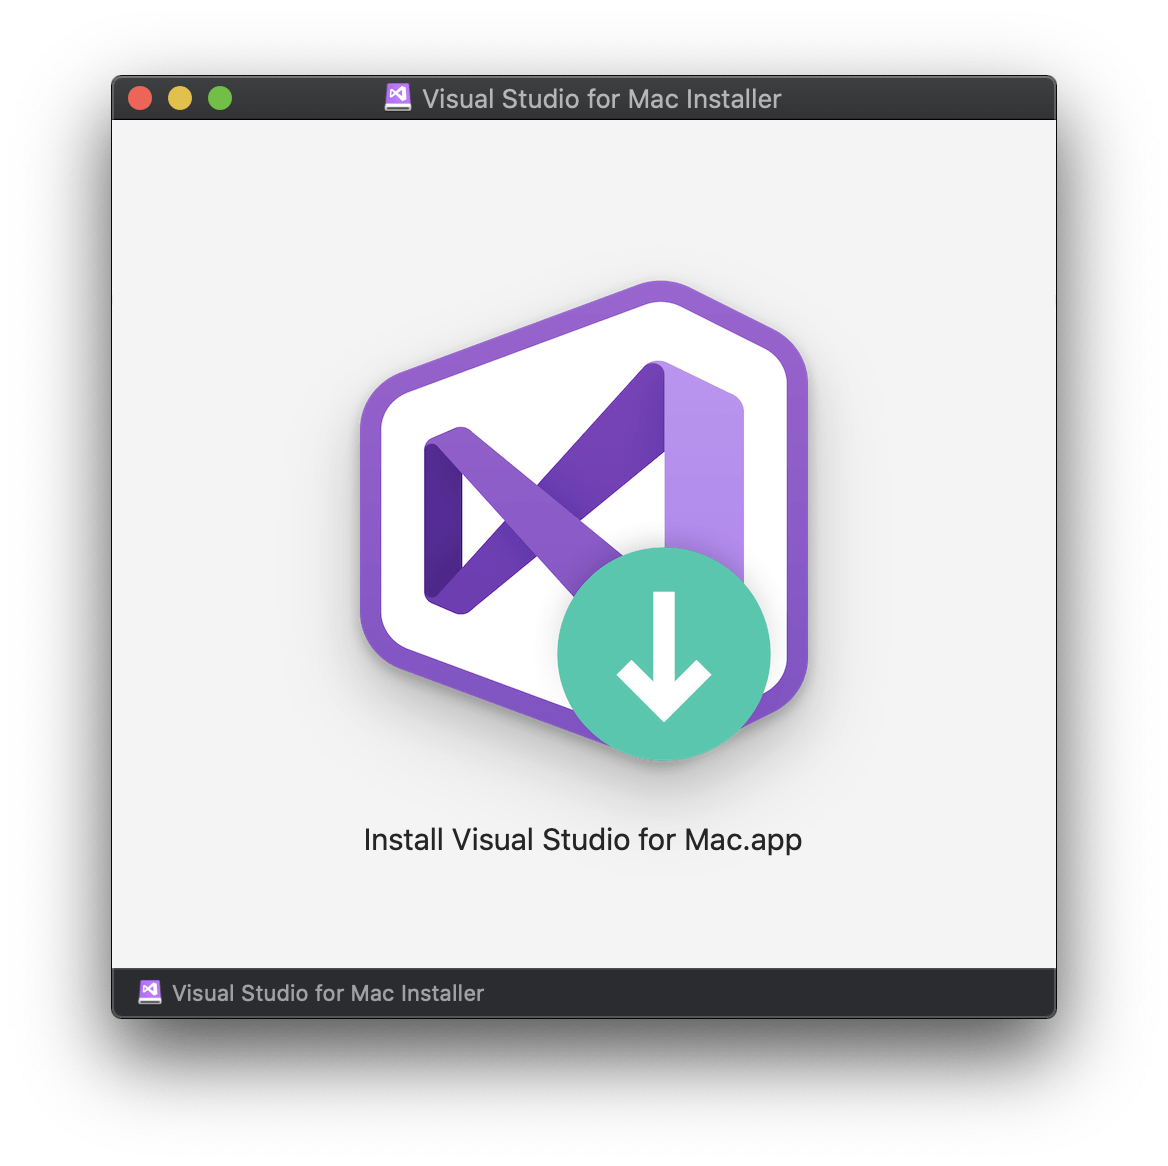
Double-click in the middle of the displayed installer screen to start the installation.

“”Install Visual Studio for Mac” is an application downloaded from the Internet.Are you sure you want to open it?A confirmation message will be displayed. Click “Open”.

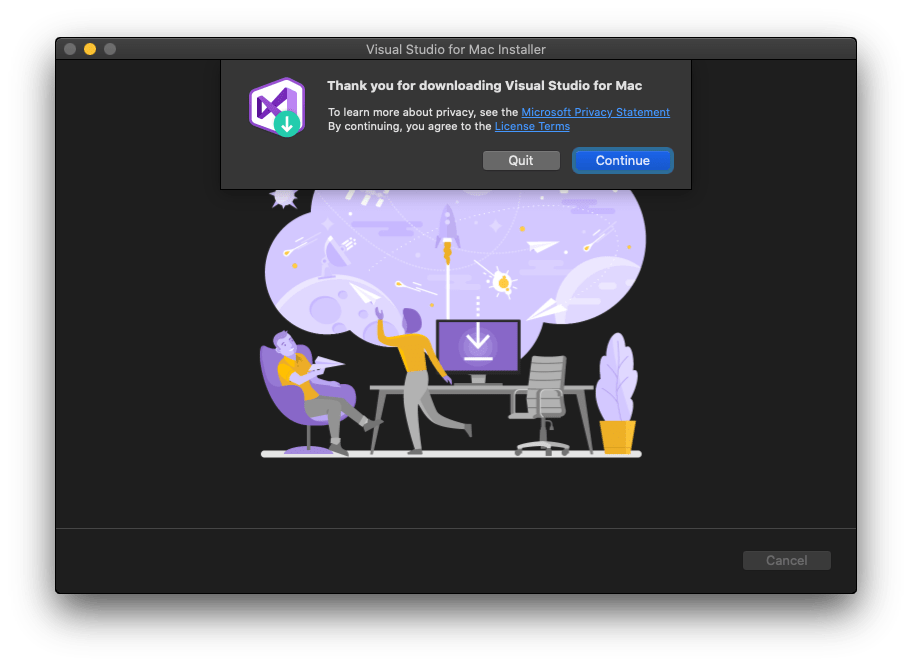
The message “Thank you for downloading Visual Studio for Mac” is displayed. Click “Continue”.
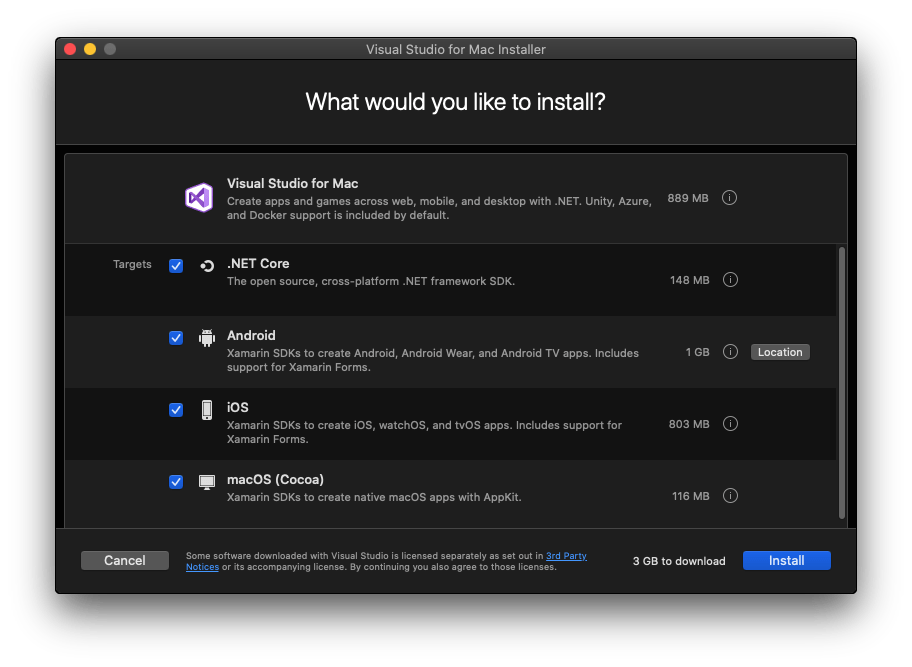
“What would you like to install?”Is displayed, so I want to make it a multi-OS development environment this time, so check all and click “Install”.
Download and installation will start.
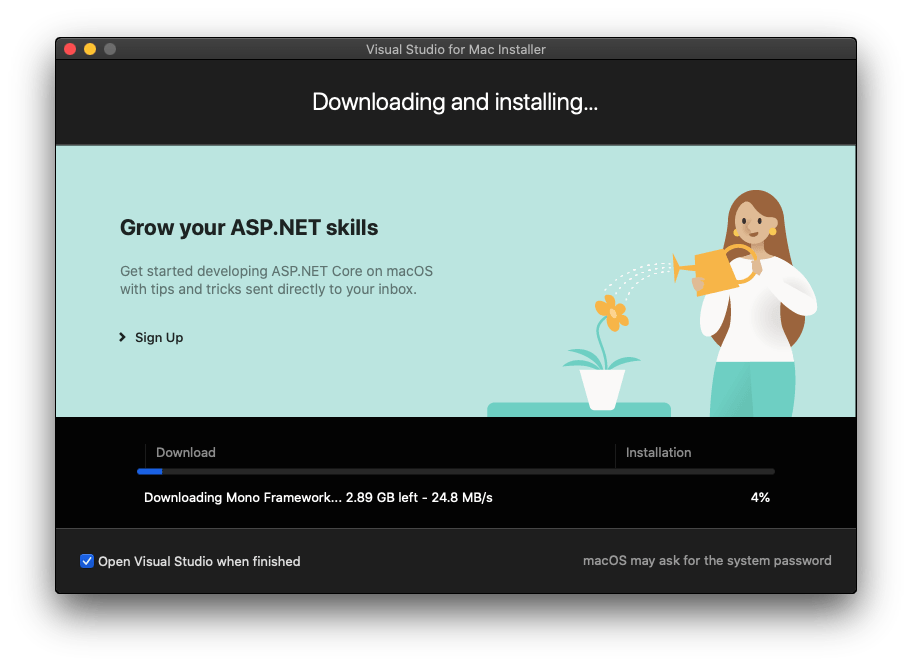
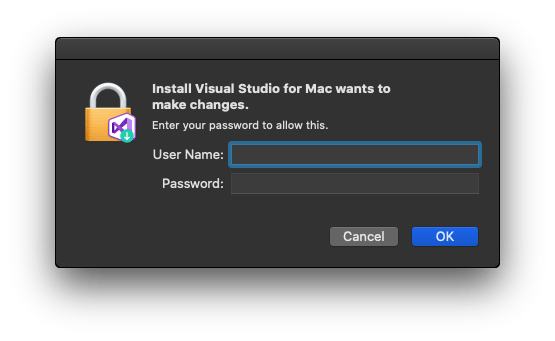
You will be asked to enter the administrator user name and password several times during installation, so enter them each time and click “OK”.
Xcode installation
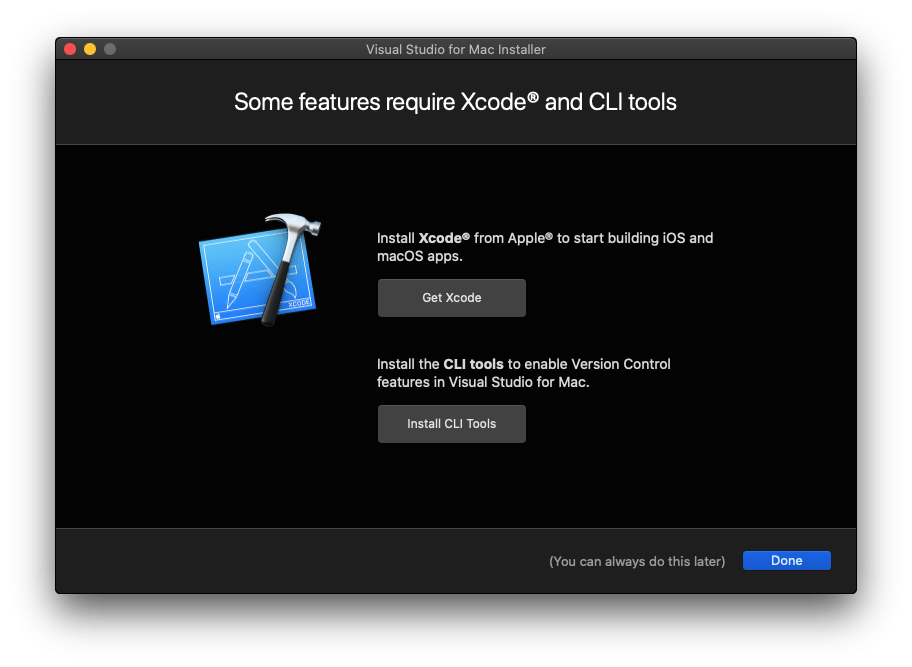
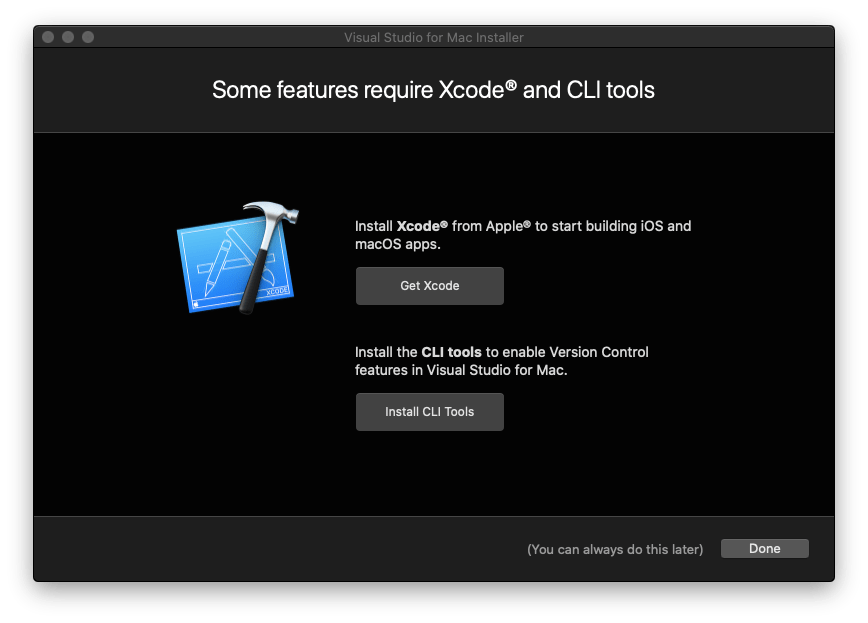
Since “Some features require Xcode and CLI tools” is displayed, first click “Get Xcode” which could not be installed on MacBook Pro (15-inch, Mid 2010)
The App Store starts up and Xcode is displayed, so click “Get”. When the download is complete, “Open” will appear, so click “Open”.
Since Visual Studio for Mac is about 3GB and Xcode is 8.1GB, it took longer to install than Visual Studio for Mac.

When you click “Open”, “Install additional required components?” is displayed. Click “Install”.

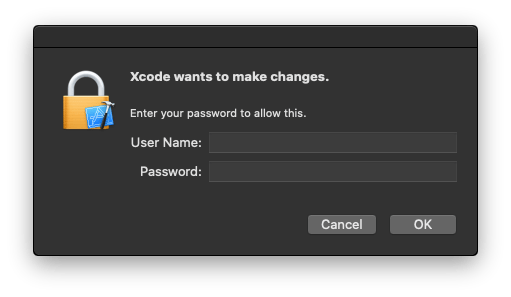
You will be asked to enter the administrator user name and password, so enter them and click OK.
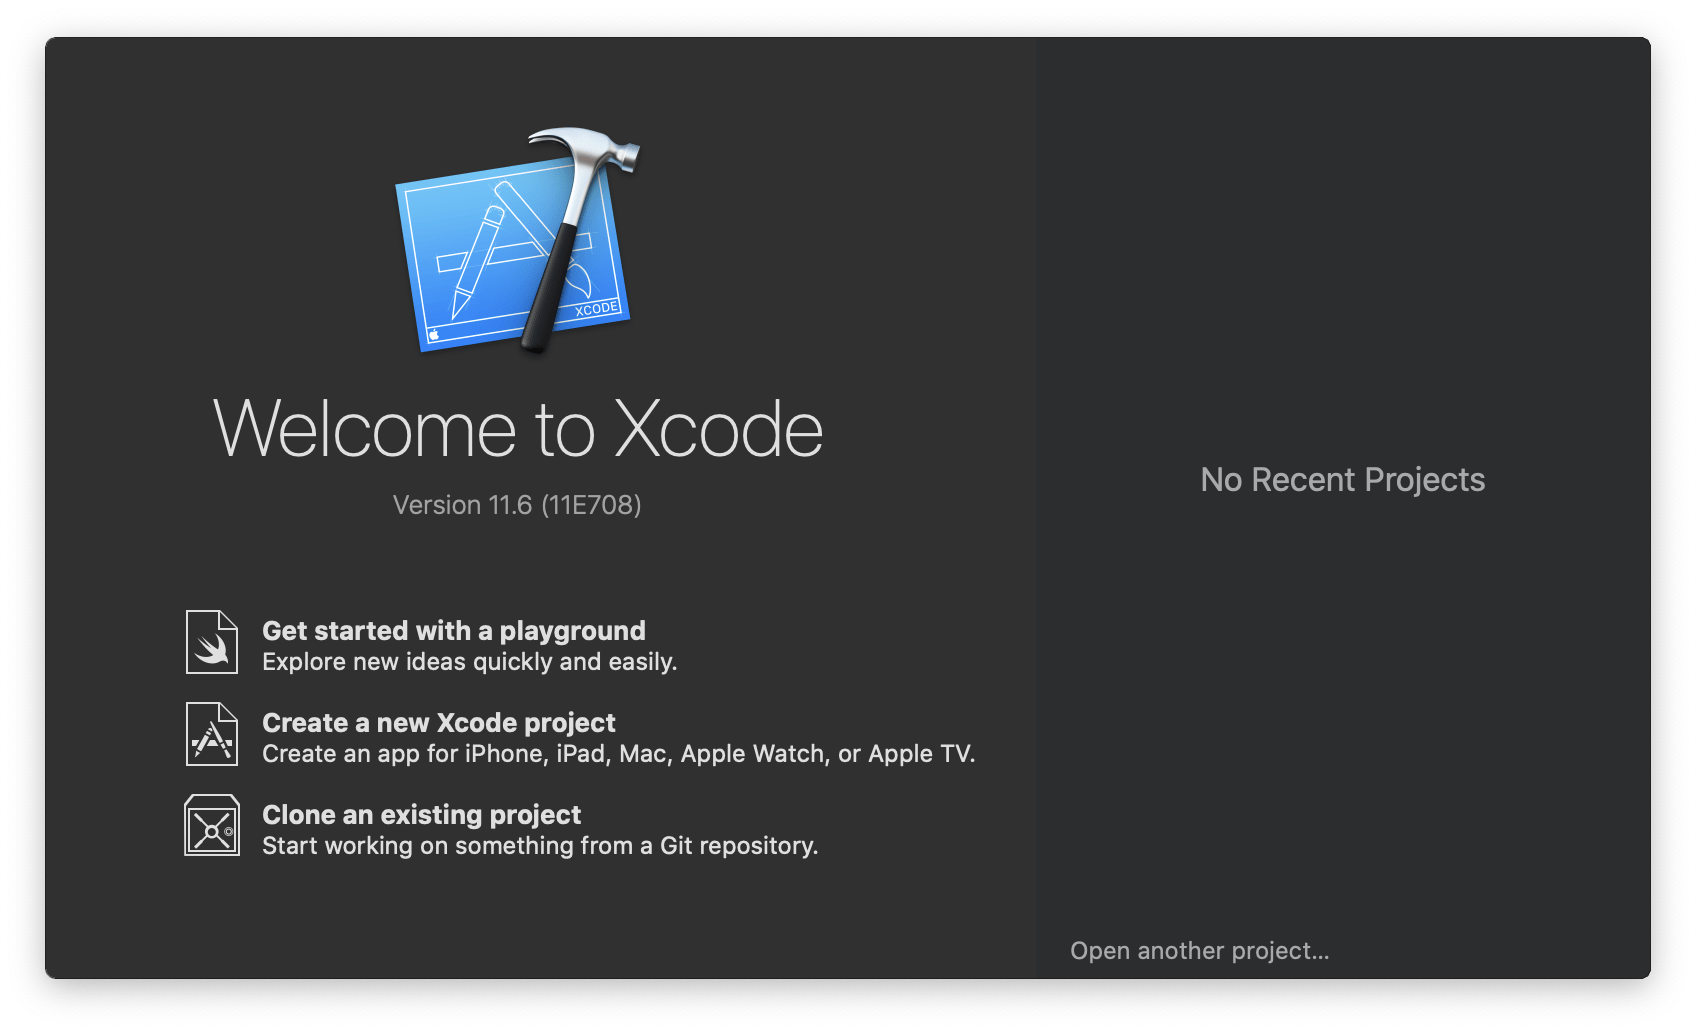
After a while, “Welcome to Xcode” will be displayed and Xcode installation is complete.
CLI tool installation
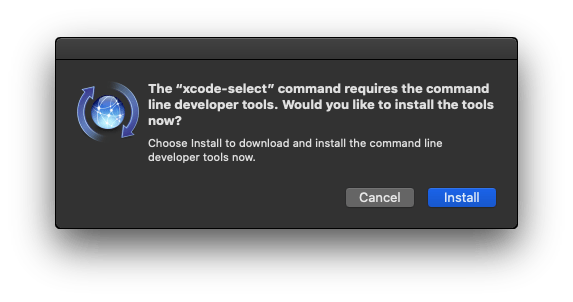
Display the “Some features require Xcode and CLI tools” screen of the Visual Studio for Mac installer again, and then click “Install CLI tools”.
“The “xcode-select” command requires the command line developer tools.Would you like to install the tools now? Is displayed, click “Install”.
When the Command Line Tools license agreement is displayed, click “Agree”.

After a while, “The software was installed.Is displayed and “CLI Tool Installation” is completed, click “Finish”.

Installation complete
Display the “Some features require Xcode and CLI tools” screen of the Visual Studio for Mac installer again, and click [Done].

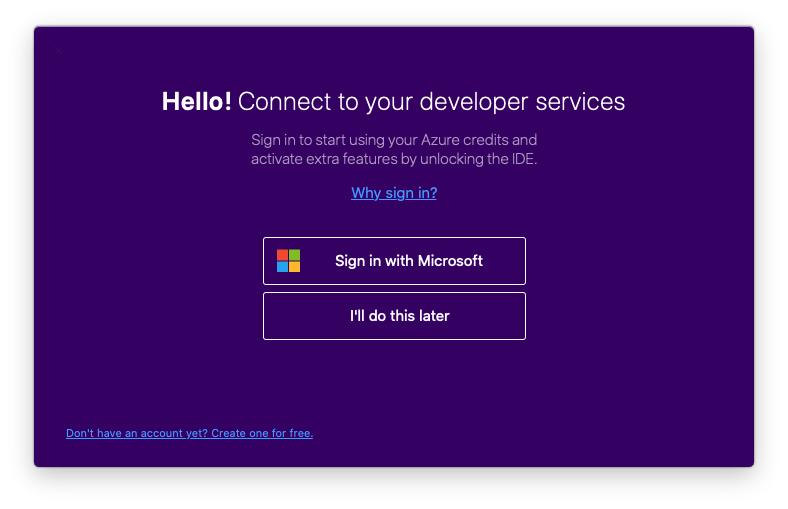
You will be asked if you want to sign in to your Microsoft account, but you can set it later, so click “I’ll do this later”.
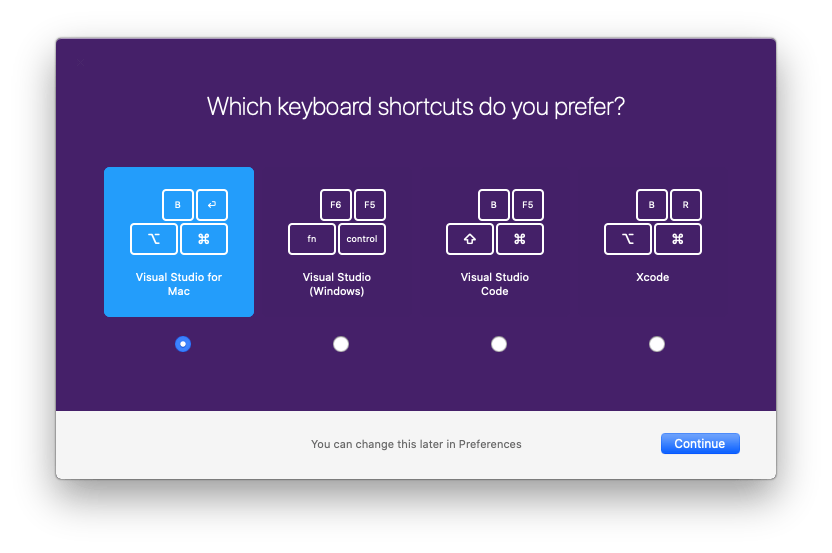
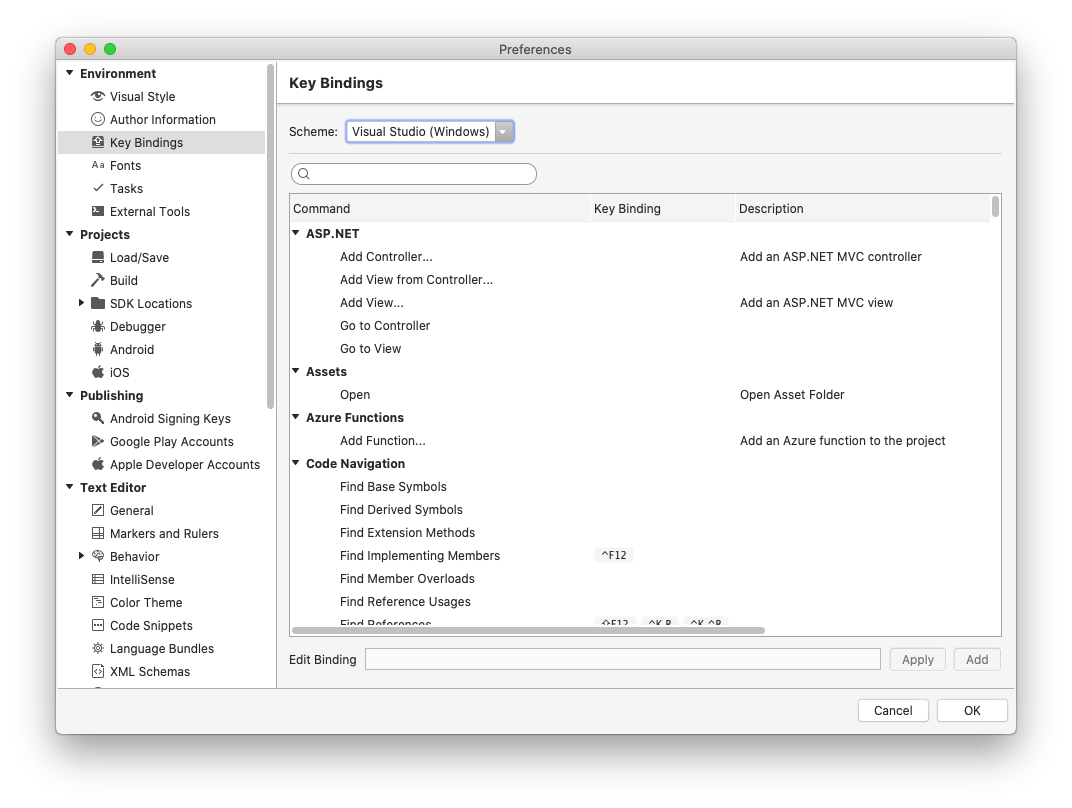
You will be asked for keyboard shortcut settings. Select the familiar “Visual Studio (Windows)” and click “Continue”.
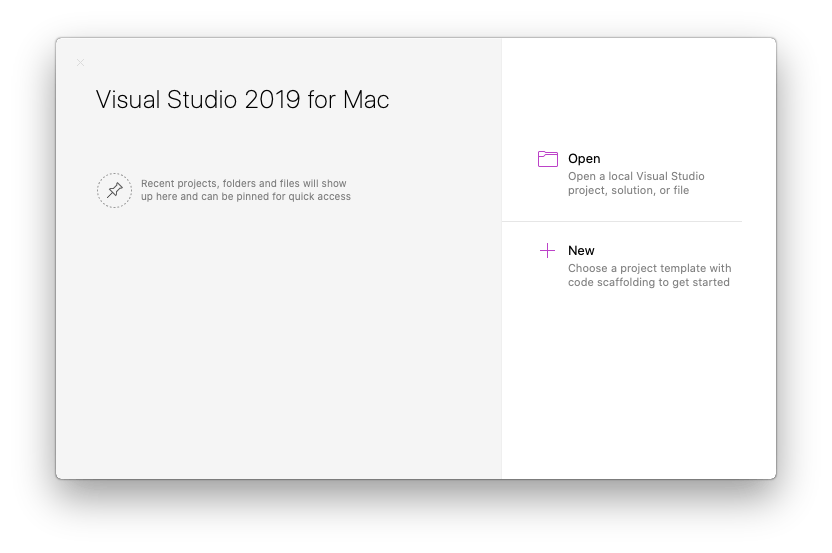
The Visual Studio 2019 for Mac screen is displayed and the installation is complete.
Clean up
Since the installation is completed, clean up the installers that are no longer needed.The installer screen that started first remains displayed, so exit.
Right-click “Visual Studio for Mac Installer” on the desktop, and click “Eject “Visual Studio for Mac Installer””.

The installer file of Visual Studio for Mac downloaded at the beginning is also unnecessary, so delete it and the installation is complete.
To make Visual Studio for Mac easier to use, see the URL below.
Comment